











💲 Quick Sale Configuration
The Quick Sale setup in Ascora streamlines the process of capturing sales transactions quickly and efficiently. This module is designed to record cash sales or outlet sales under a dedicated job type, which simplifies reporting and management of quick sales. The configuration allows you to set a default customer, choose a receipt template optimized for your printer, and even trigger an immediate stock update when an invoice is generated. Additionally, you can designate a specific register (i.e., a designated PC or store location) for processing sales, ensuring that every transaction is correctly tracked within your system.
Key Configuration Areas:
- Job Type:
All Quick Sales will be automatically stored under a designated job type for streamlined reporting.Default Customer:
Set a default customer record (e.g., "Cash Sale" or "Outlet Sale") that will be pre-assigned to every new Quick Sale. This value can be updated on the Quick Sale Details if needed.
- Receipt Template:
Choose the invoice template that will be used when printing receipts. Ensure that the template’s page size is configured appropriately for your receipt printer.
- Stock Update:
Optionally, configure the system to “Take Stock Immediately When an Invoice is Generated” to automatically update your inventory levels.
- Register Setup:
Create a register to represent the physical location or PC where sales are processed. This helps to track transactions by store location effective
1. You can configure Quick Sale by going to Administration → Quick Sale.
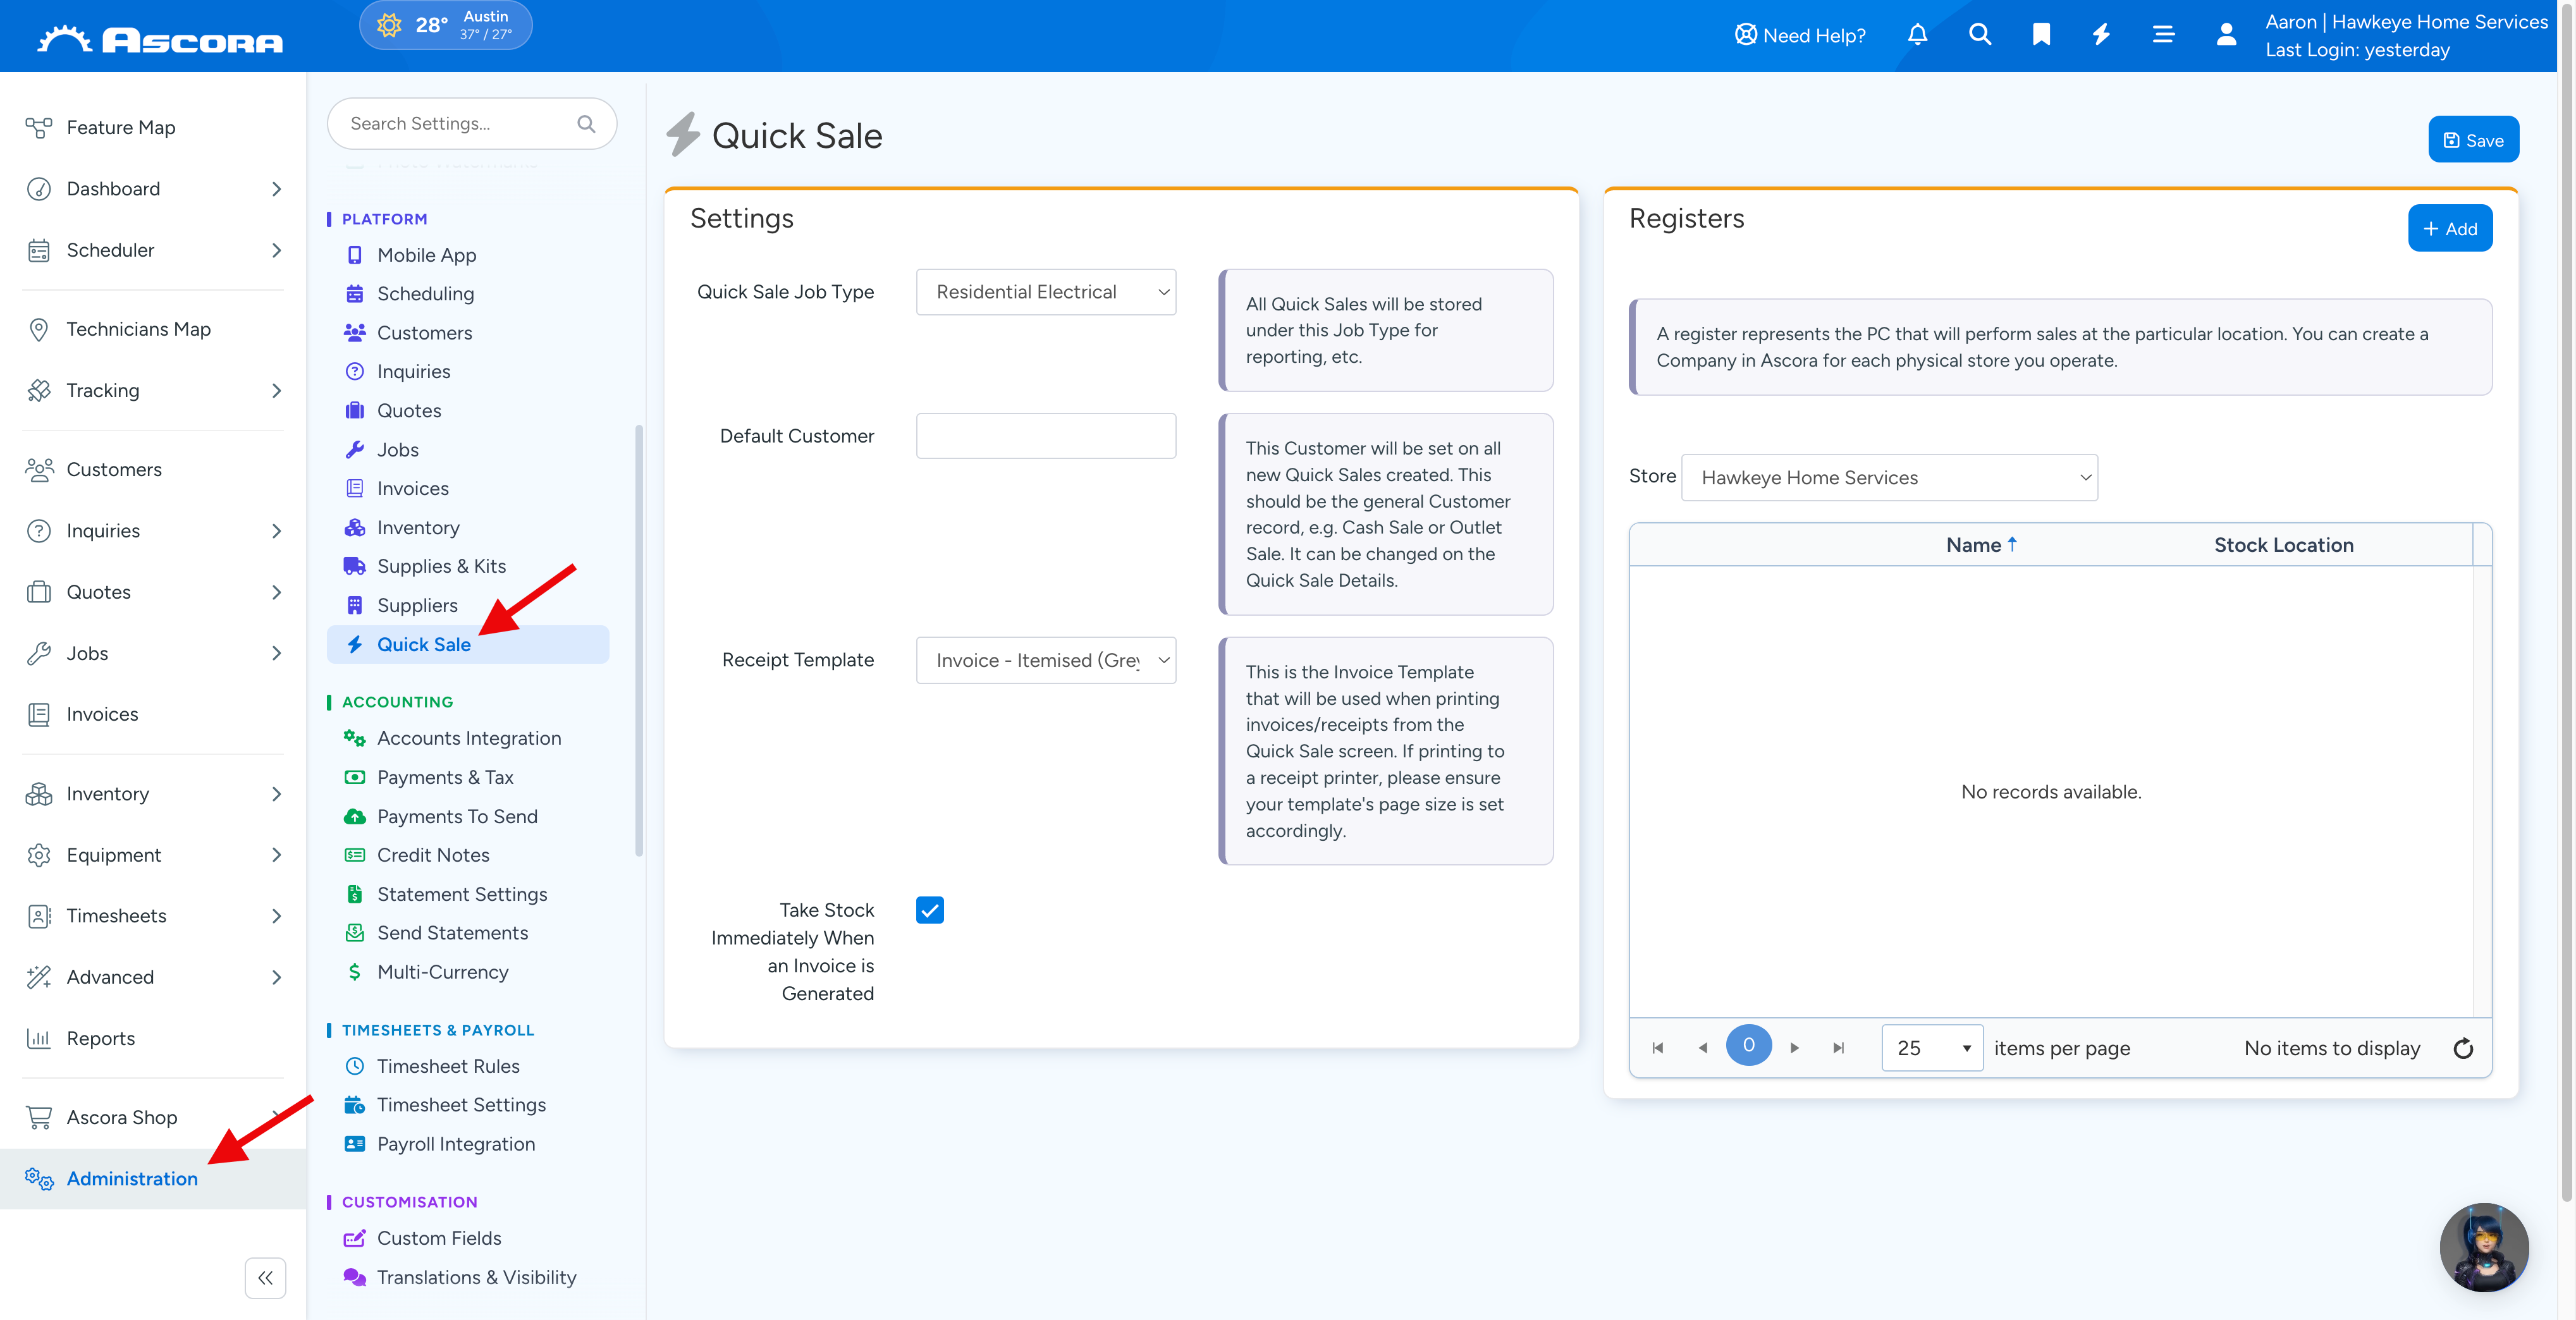
2. Complete a few configurations under Settings area.
Cash Rounding Amount - you can select to have rounding or select no rounding at all.
Quick Sale Job Type - you can set up job types in Administration → Jobs and then be able to select those job types in this area. You might set up a job type called cash sale or quick sale.
Default Customer - you have the option put your invoices and jobs against a particular customer that you can create in Customers → New. This is not necessary an actual customer but rather, a customer that you create perhaps with your own details so you can track the information. If you want to record your actual purchasing customers, you can certainly add your customer when creating a Quick Sale.
Receipt Template - You can set up a particular invoice template for Quick Sale and you can do it in Administration → Document Templates.
Note: You also have the option to enable the setting to take Stock Immediately When an Invoice is Generated by ticking the corresponding box
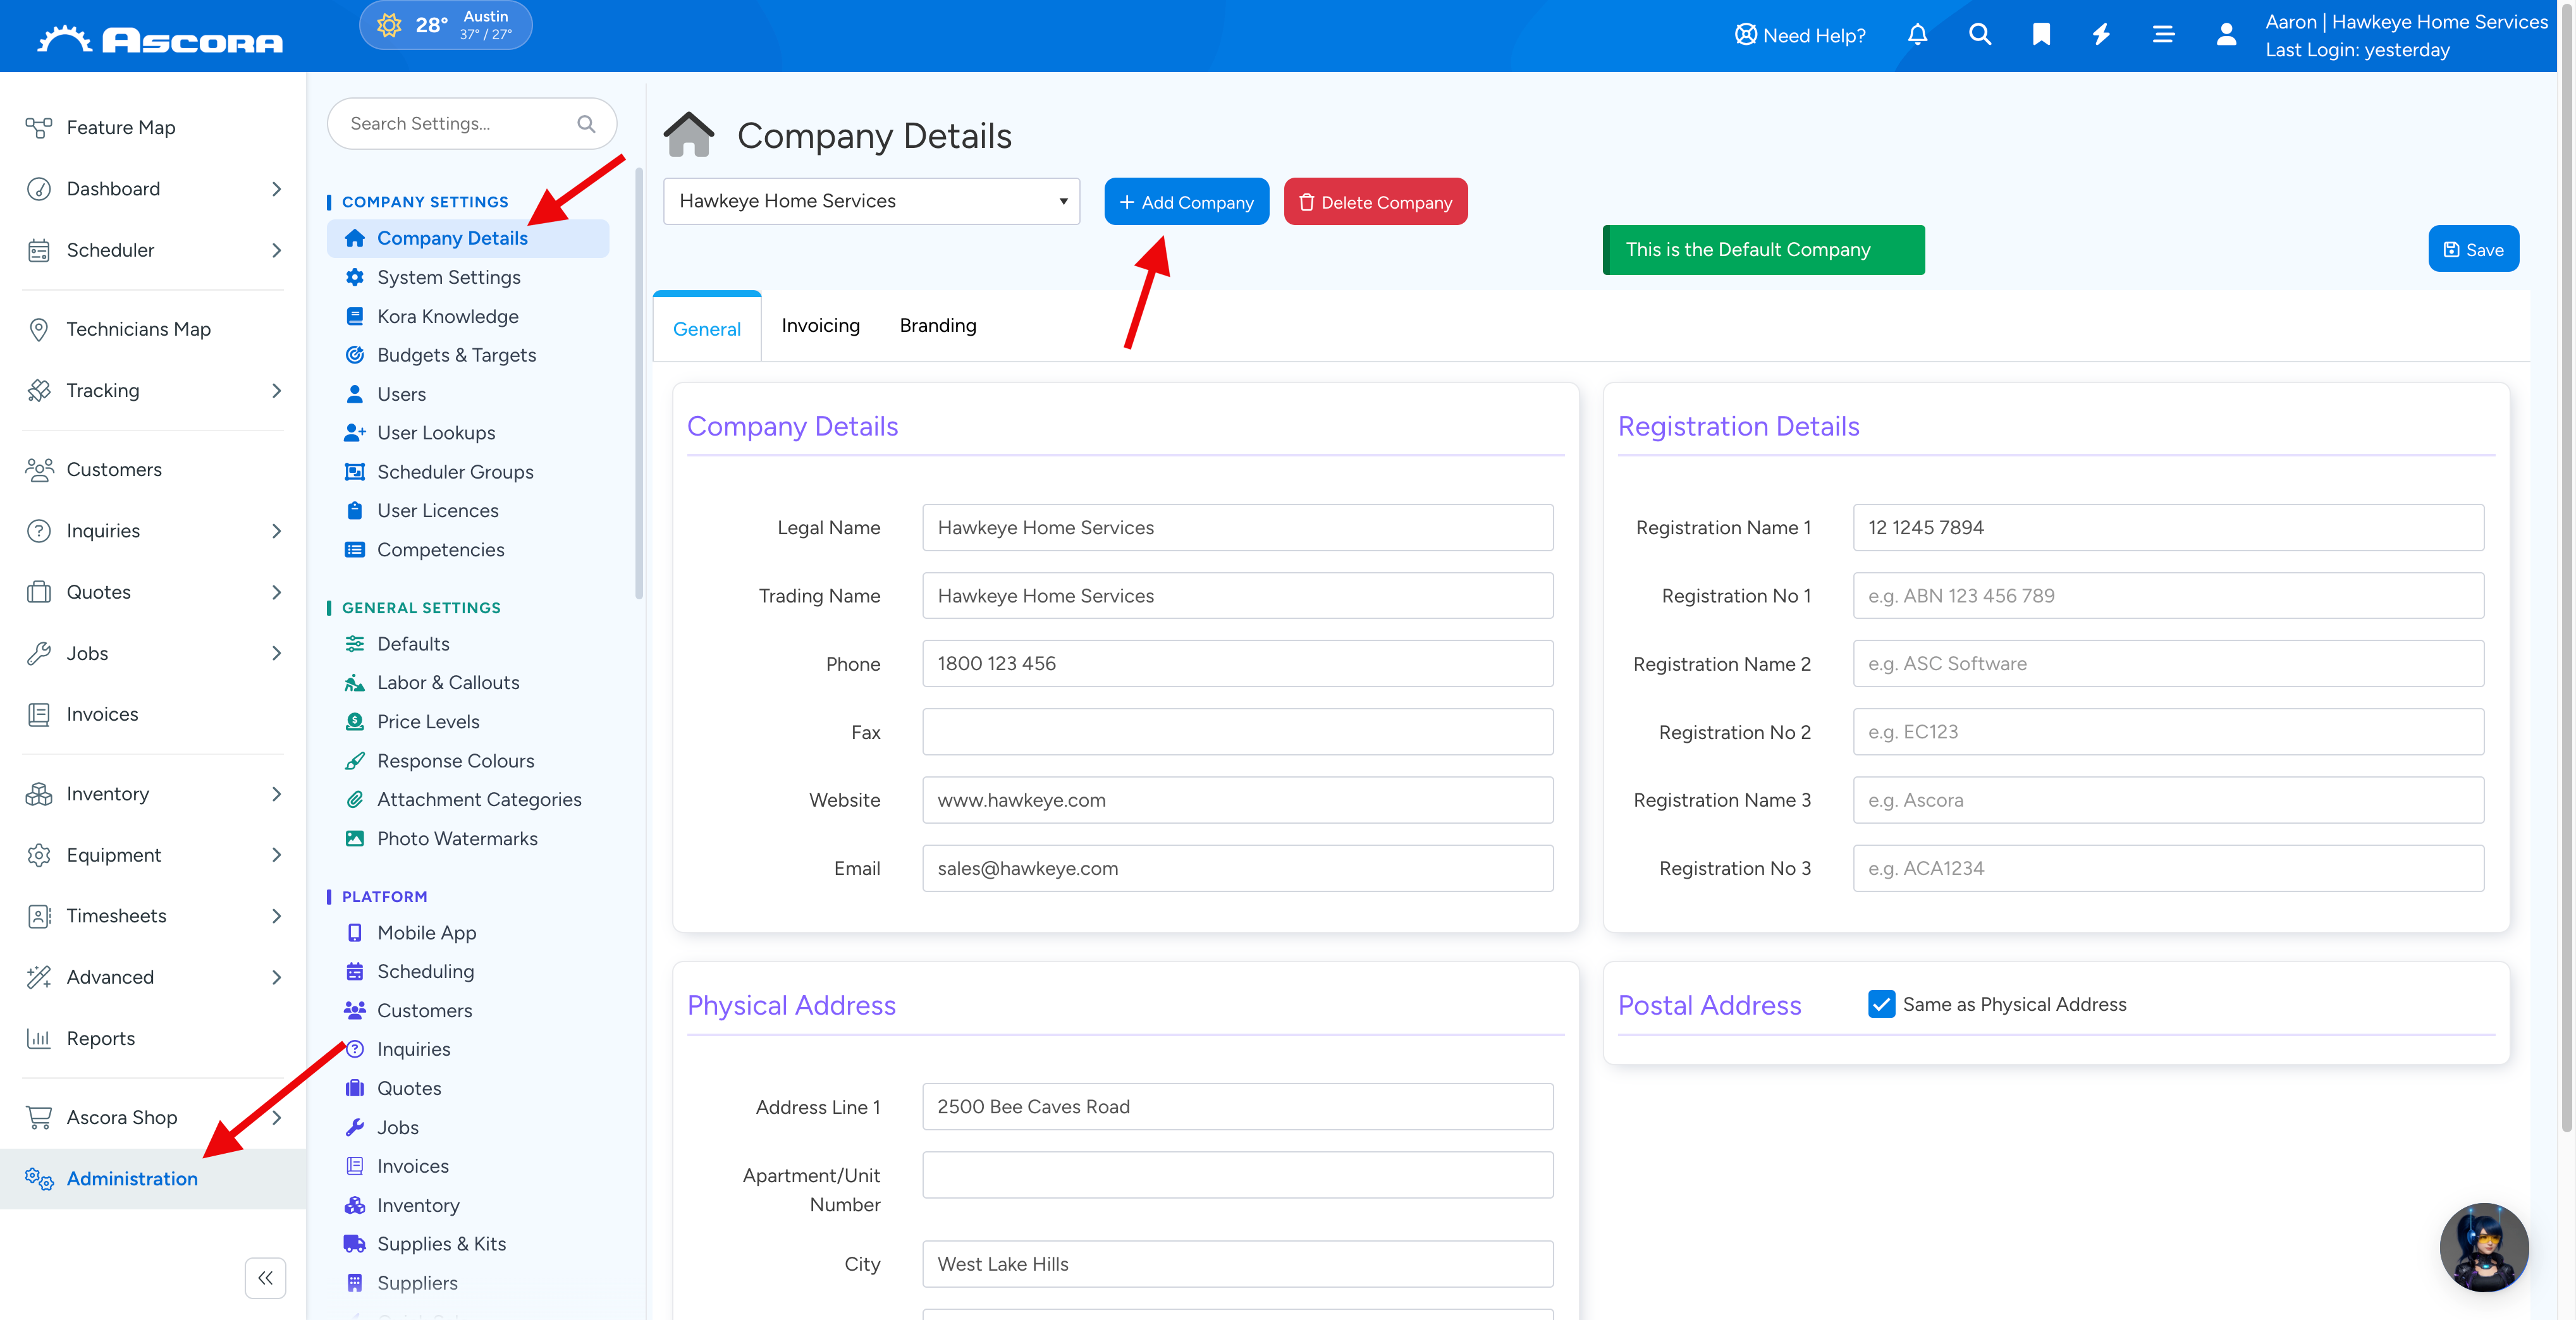
3. You can add Registers which represents the PC that will perform the sales and if you have multiple stores, you can create company names for each of the stores.
Adding of Company Names can be done in Administration → Company Details → Add Company.
Accessing your New Quick Sale
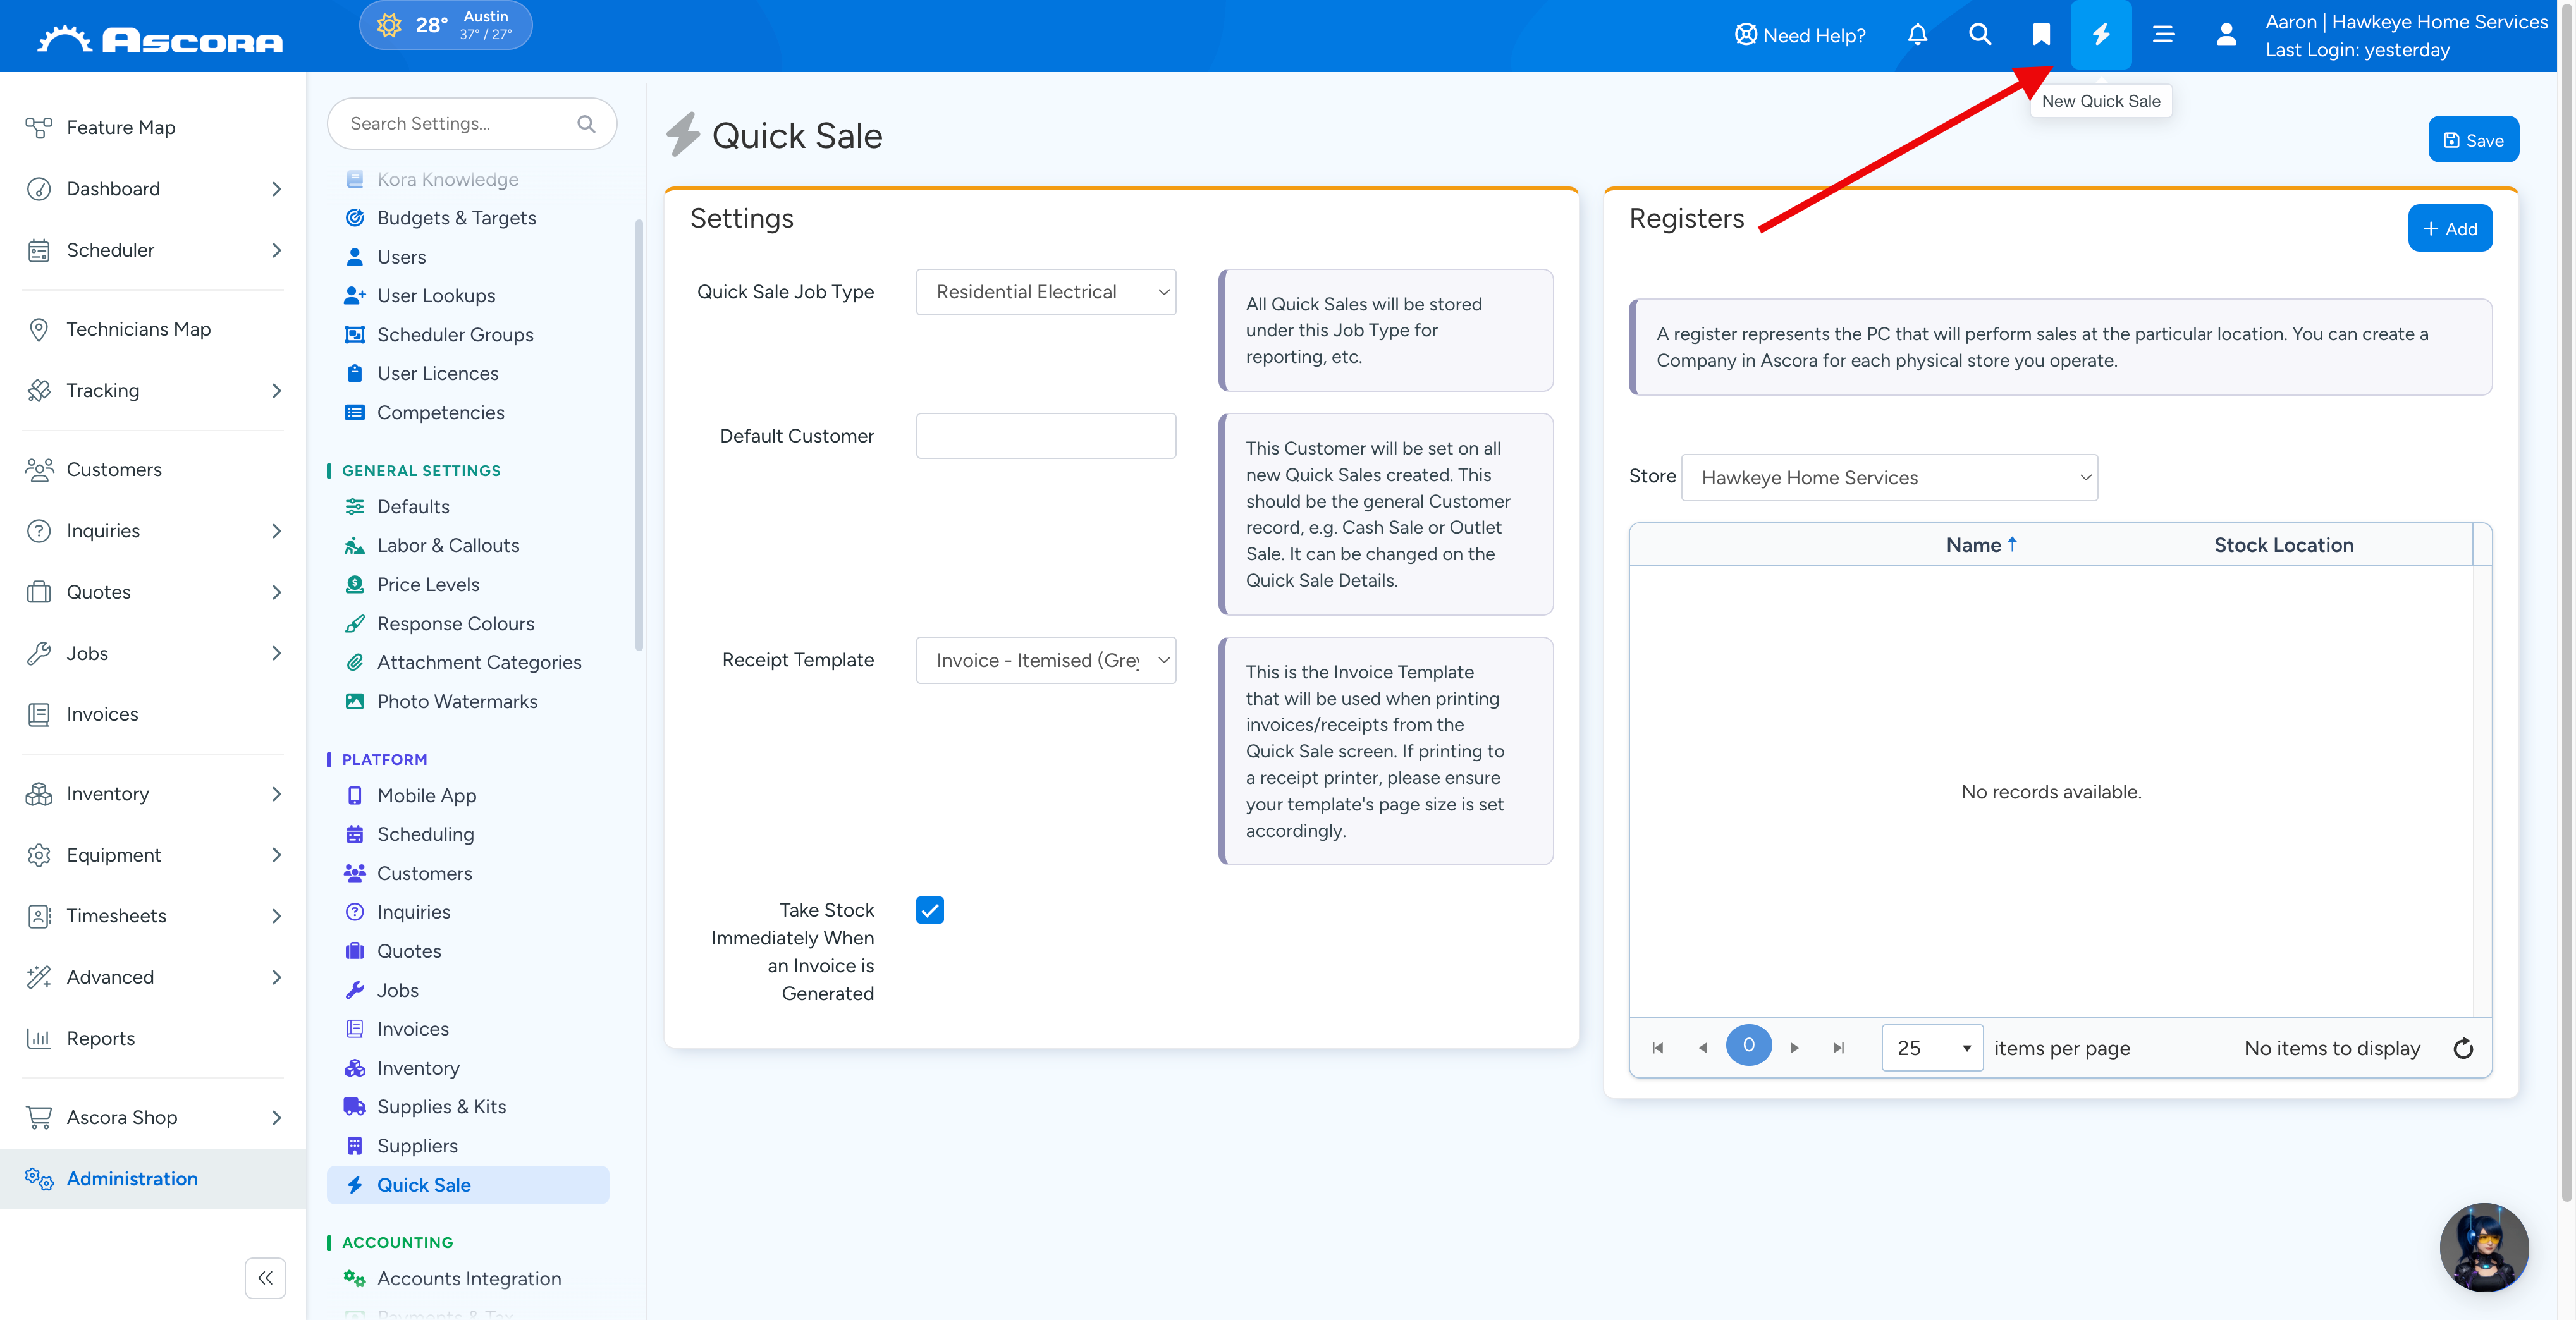
1. You can access your new Quick Sale by clicking the lightning bolt icon located above the Equipment icon as indicated below.
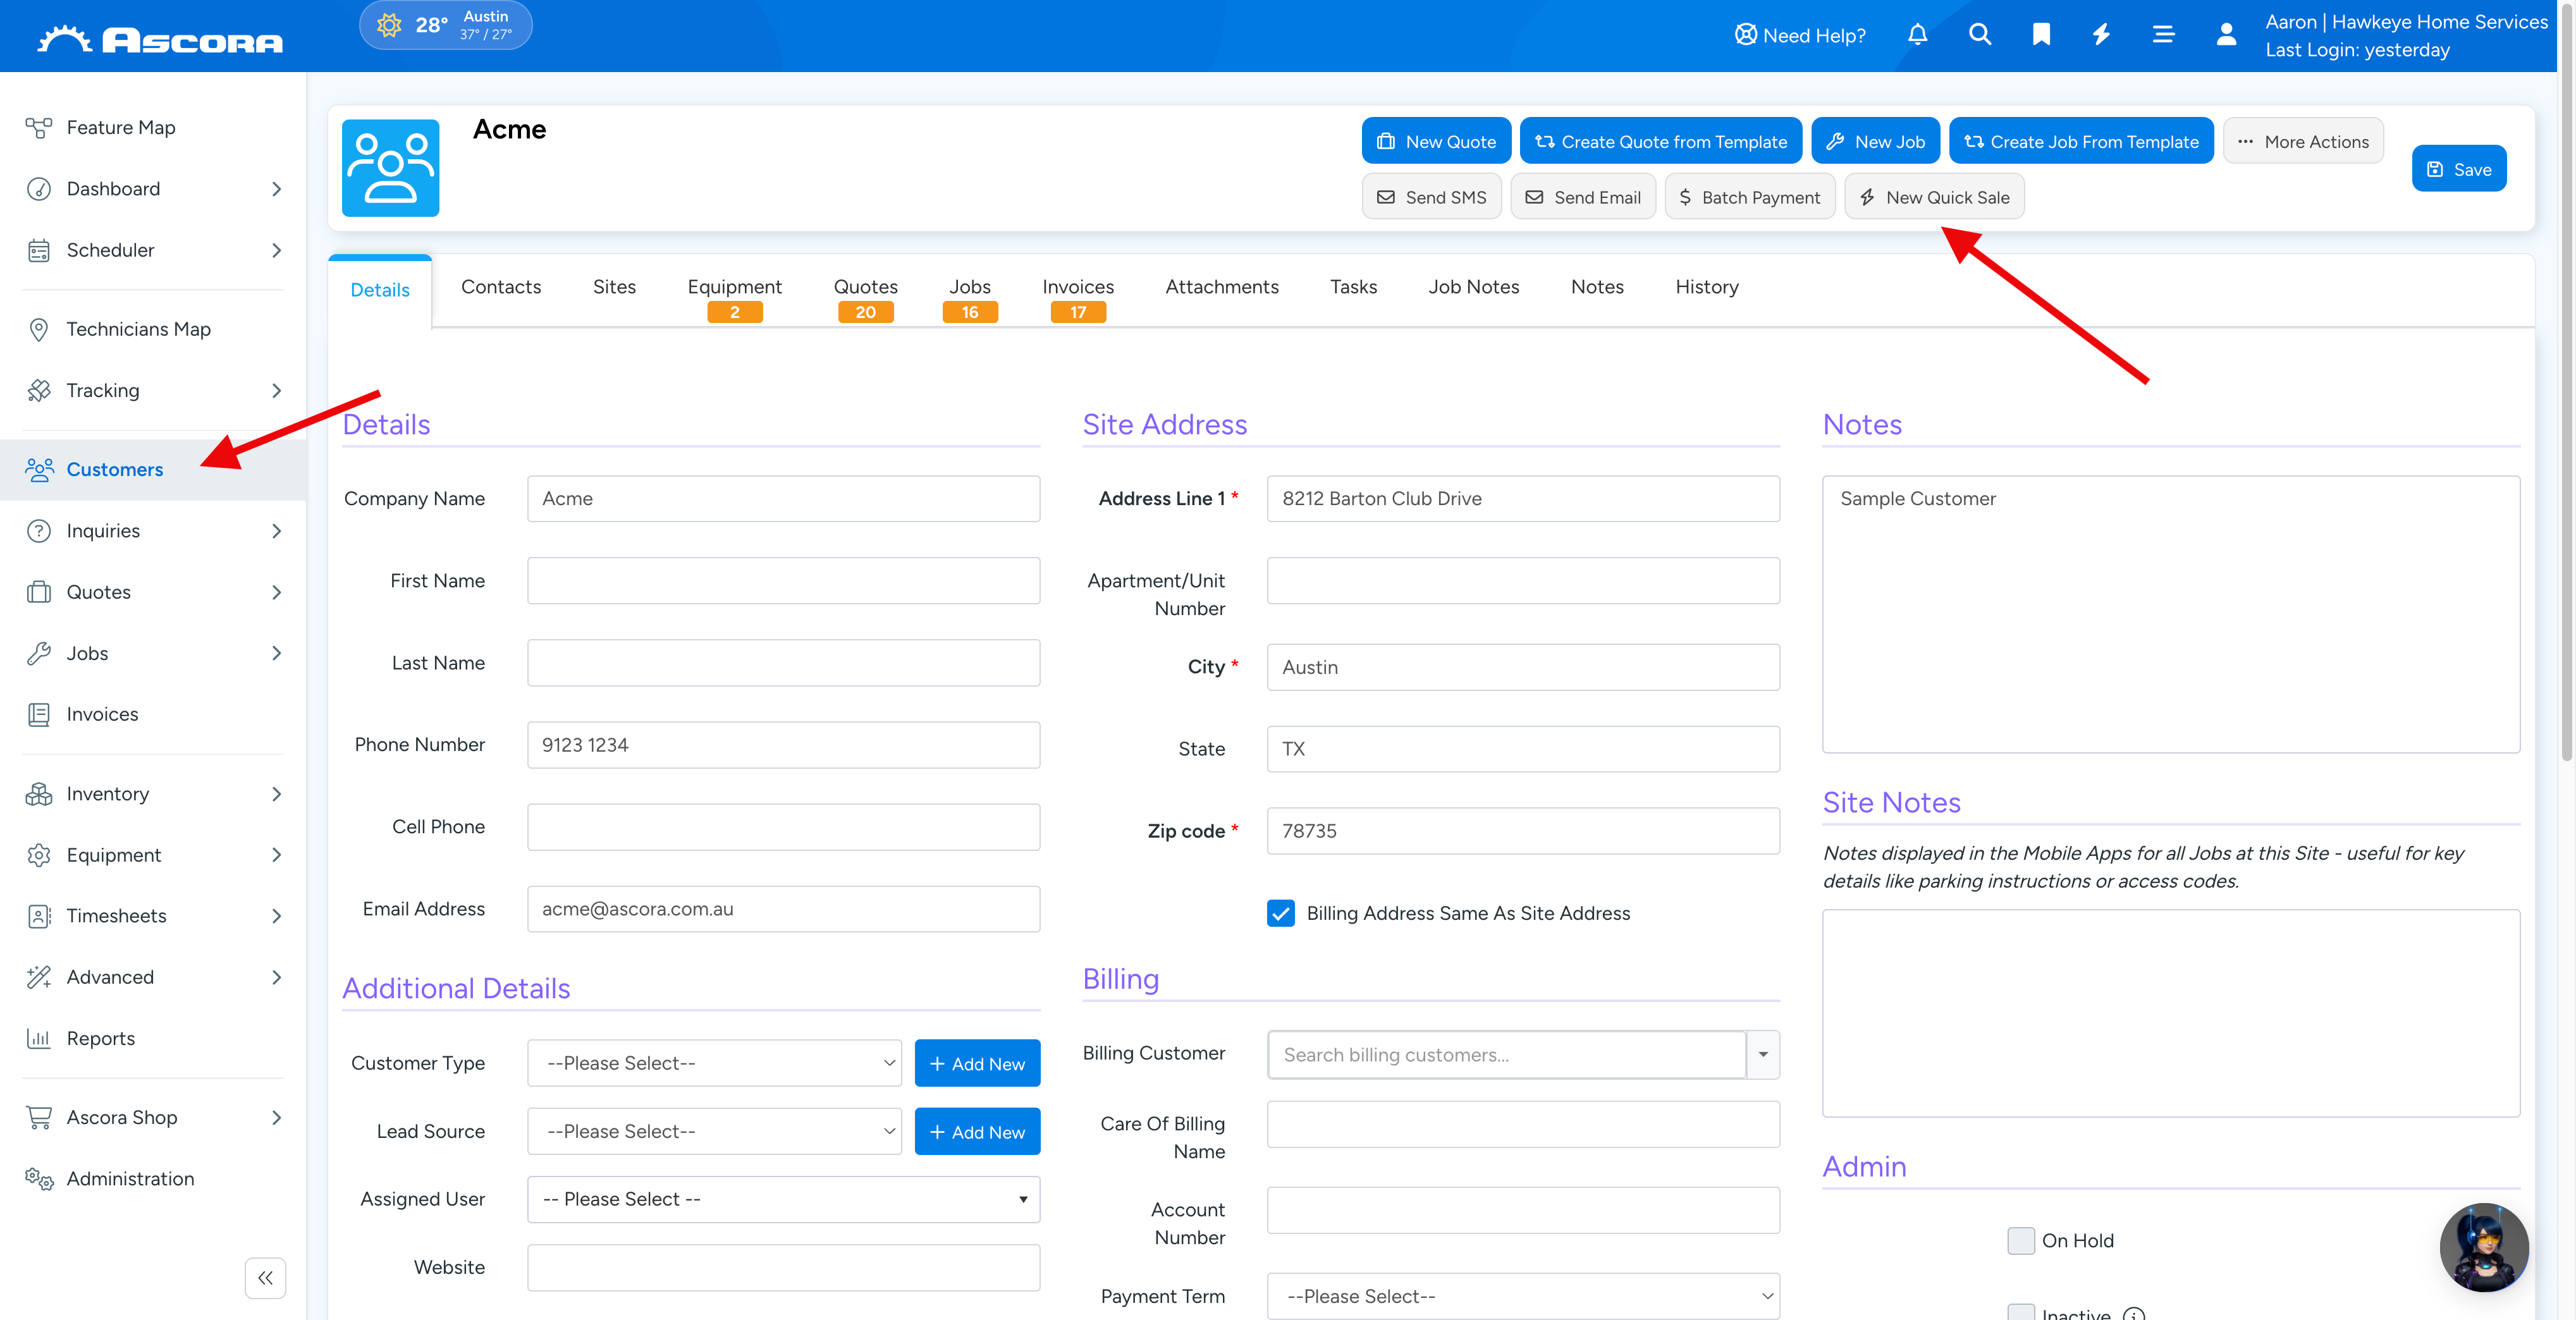
2. Another way of accessing quick sale is by going to Customers → select your Customer. You can also click New Quick Sale to create a quick sale from that screen.
Managing a Quick Sale
When you access your quick sale, you have a few available tabs to initiate a task or complete a task.
Refer to the image below as an example wherein you have the option to Add Payment, Take Stock, Email Receipt or even Print Receipt.
You can also select your particular customer from the same screen and most importantly, you can add your supplies or materials and if you have your barcodes added to each of your supply items, you can click Add by Barcode to scan the items.
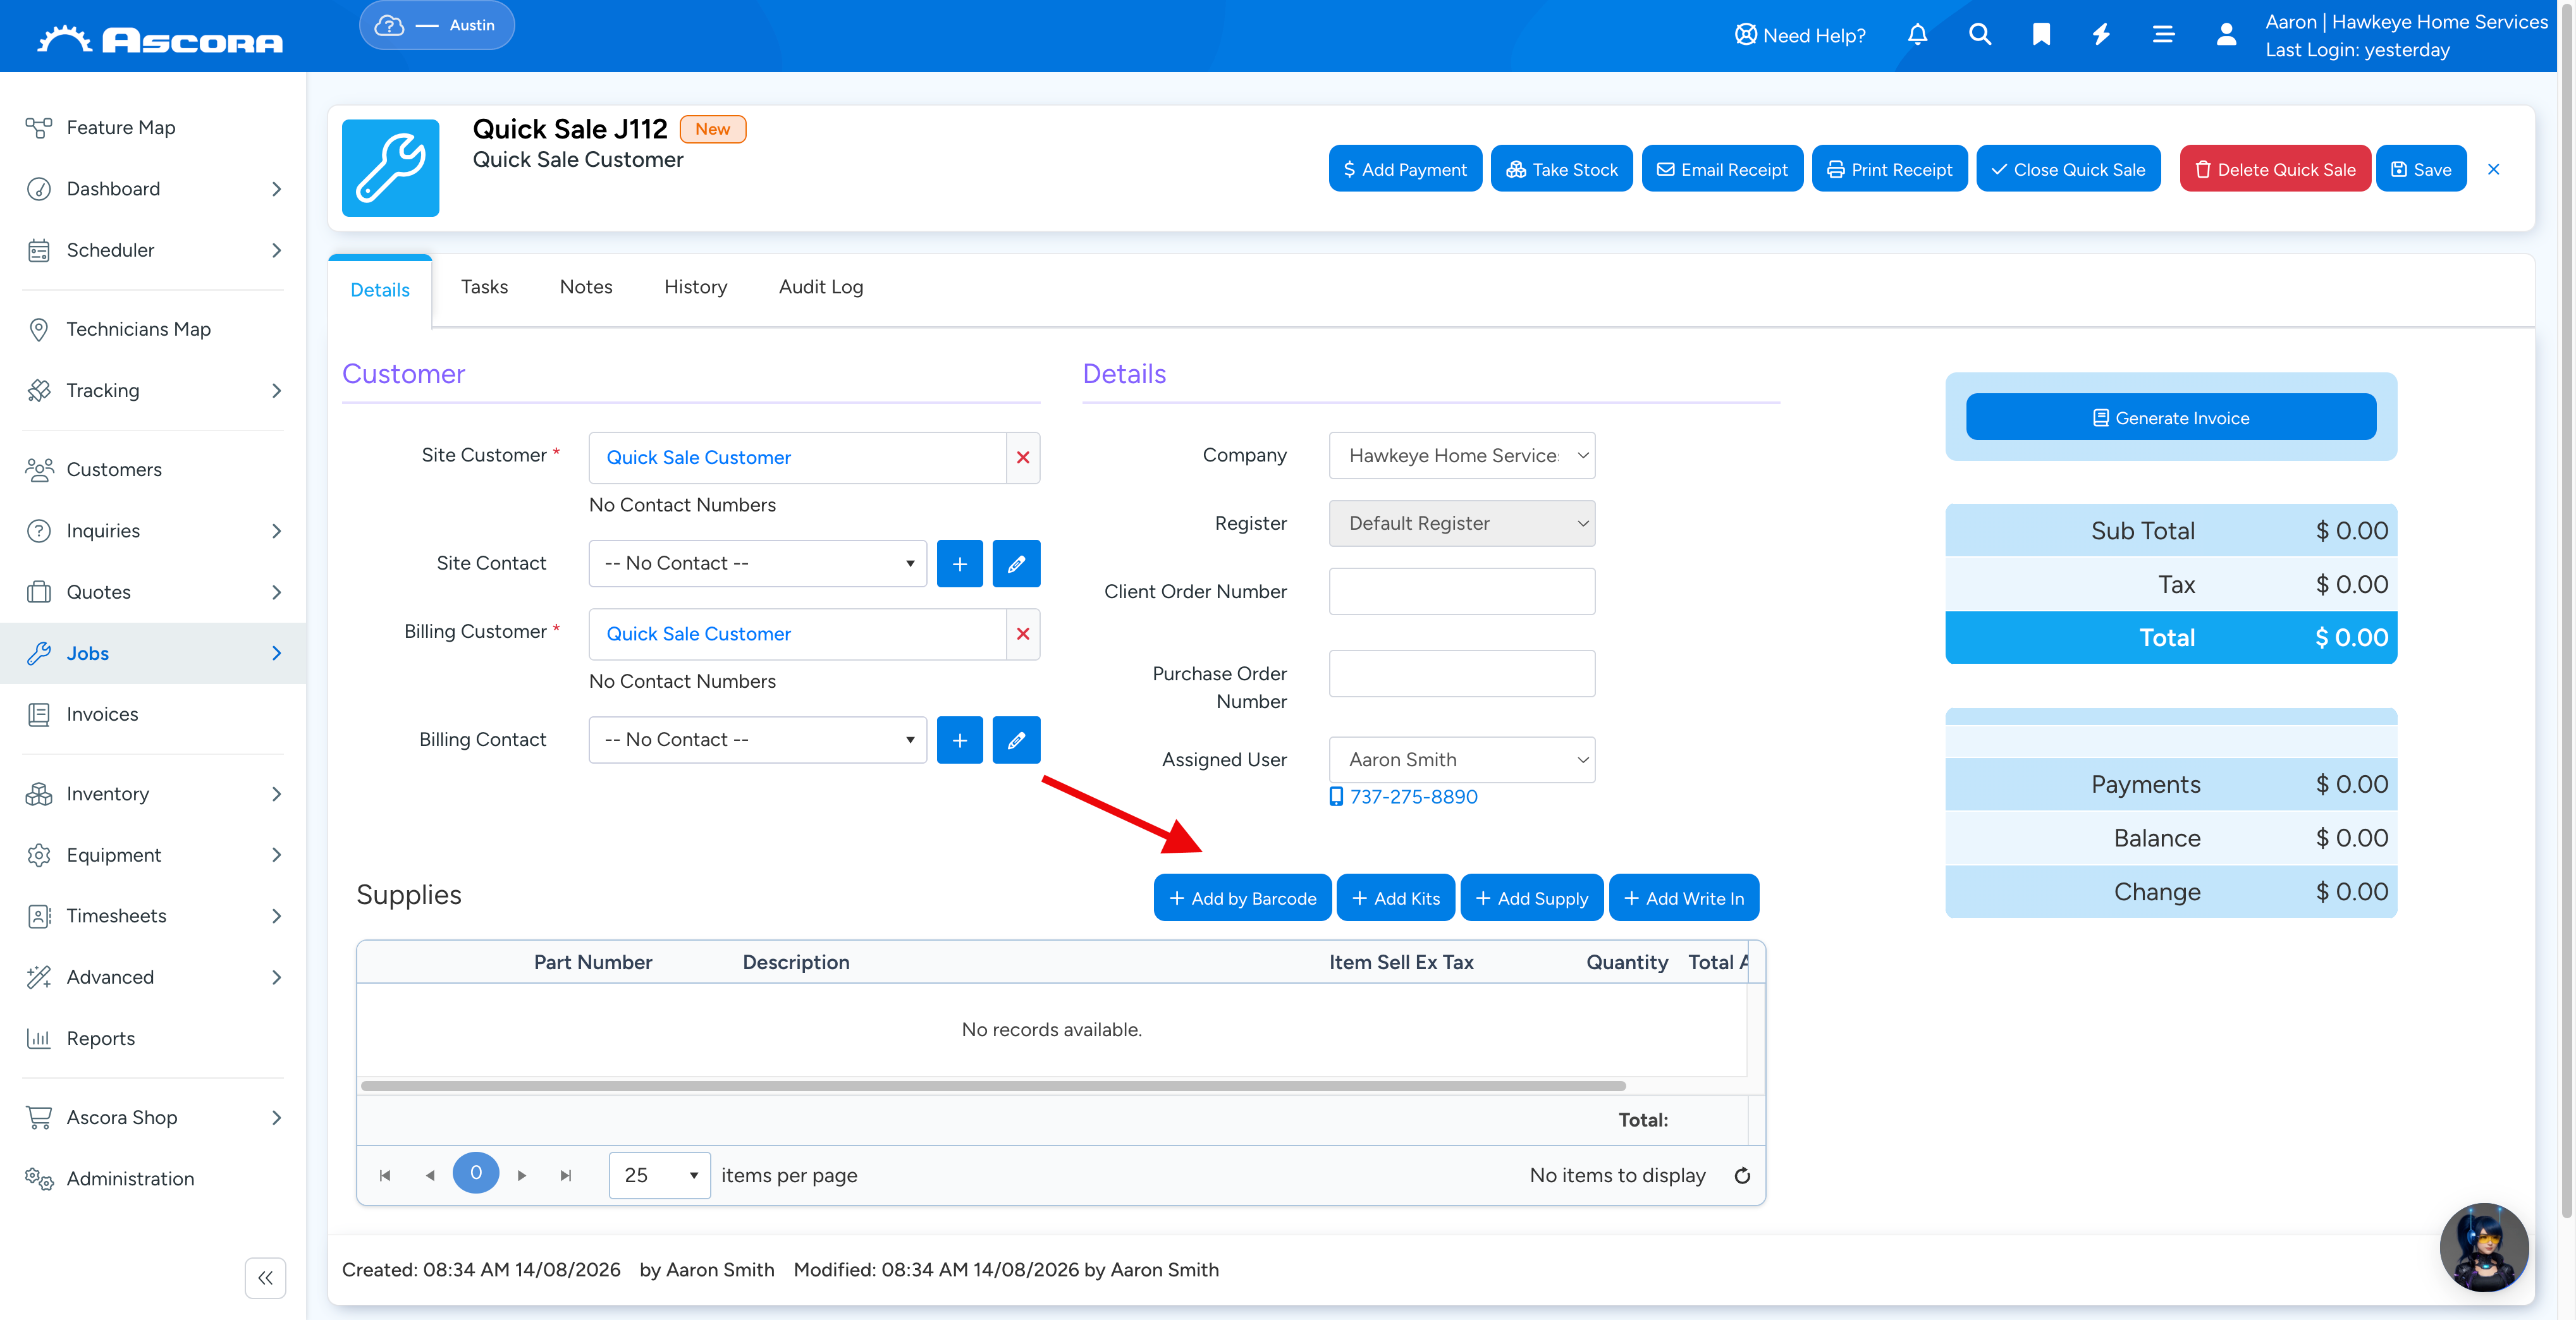
When you click Add by Barcode, the following screen appears and simply click Scan if you have a scanner connected to your computer. Otherwise, you can scan barcodes from the mobile app.
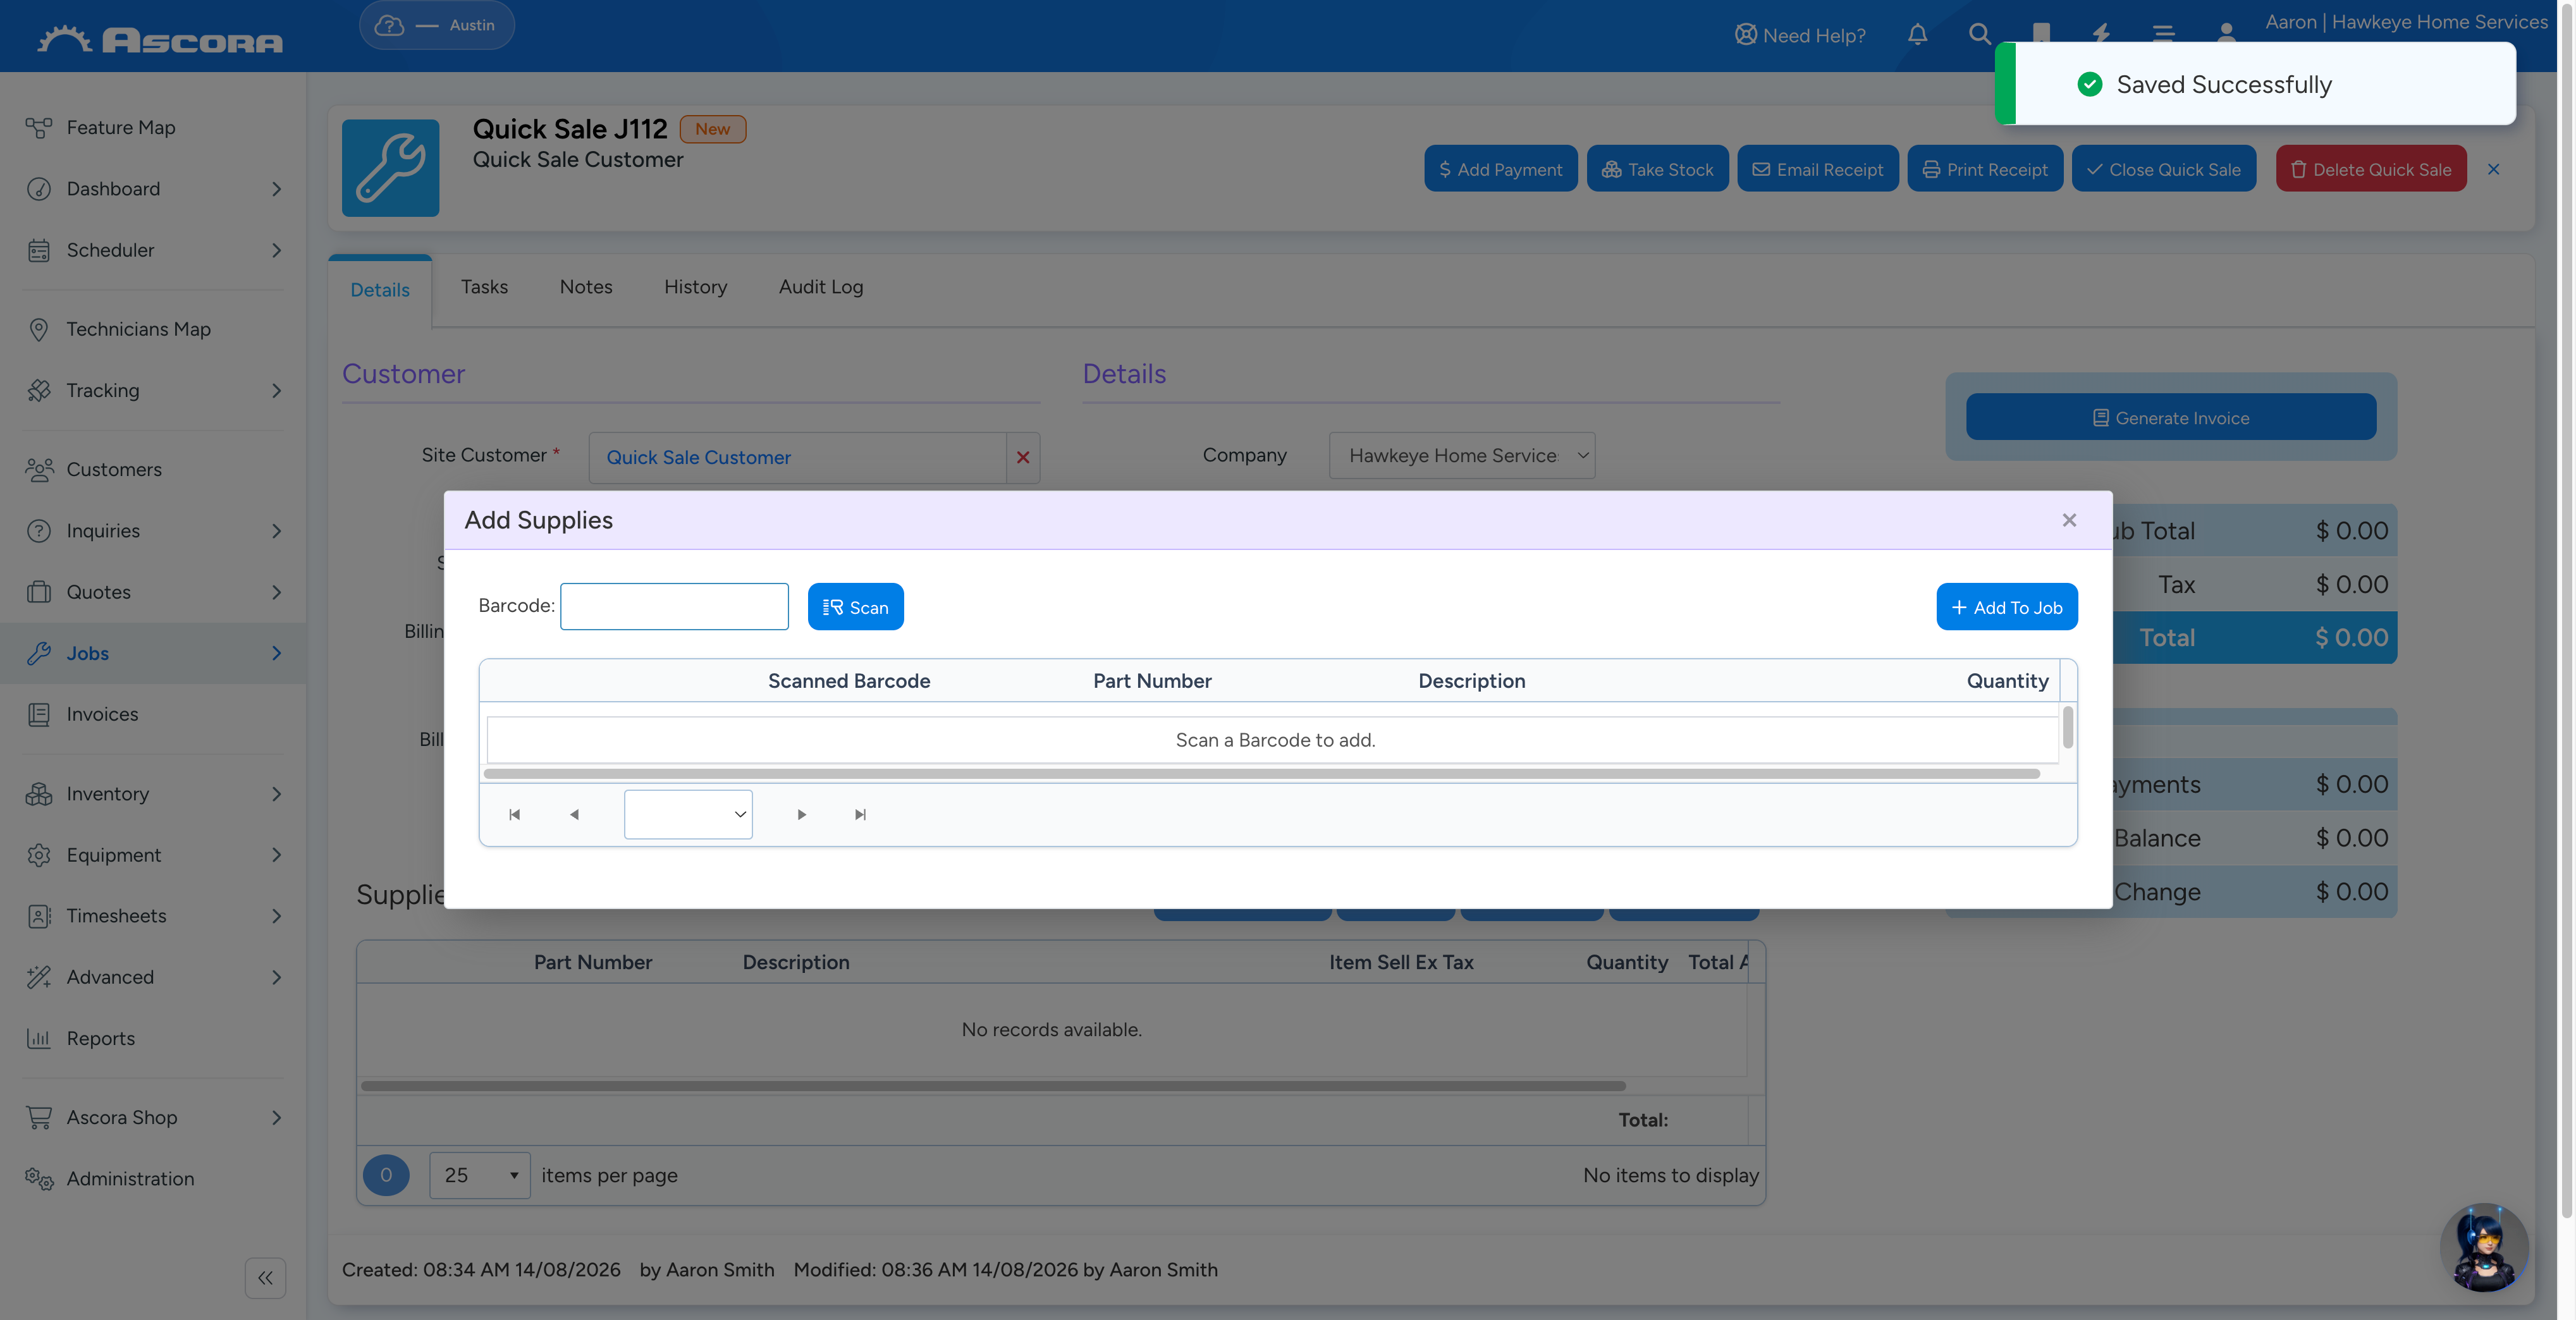
Note: To learn more about how barcodes work, please see Working with Barcodes user guide.
Generating Invoice
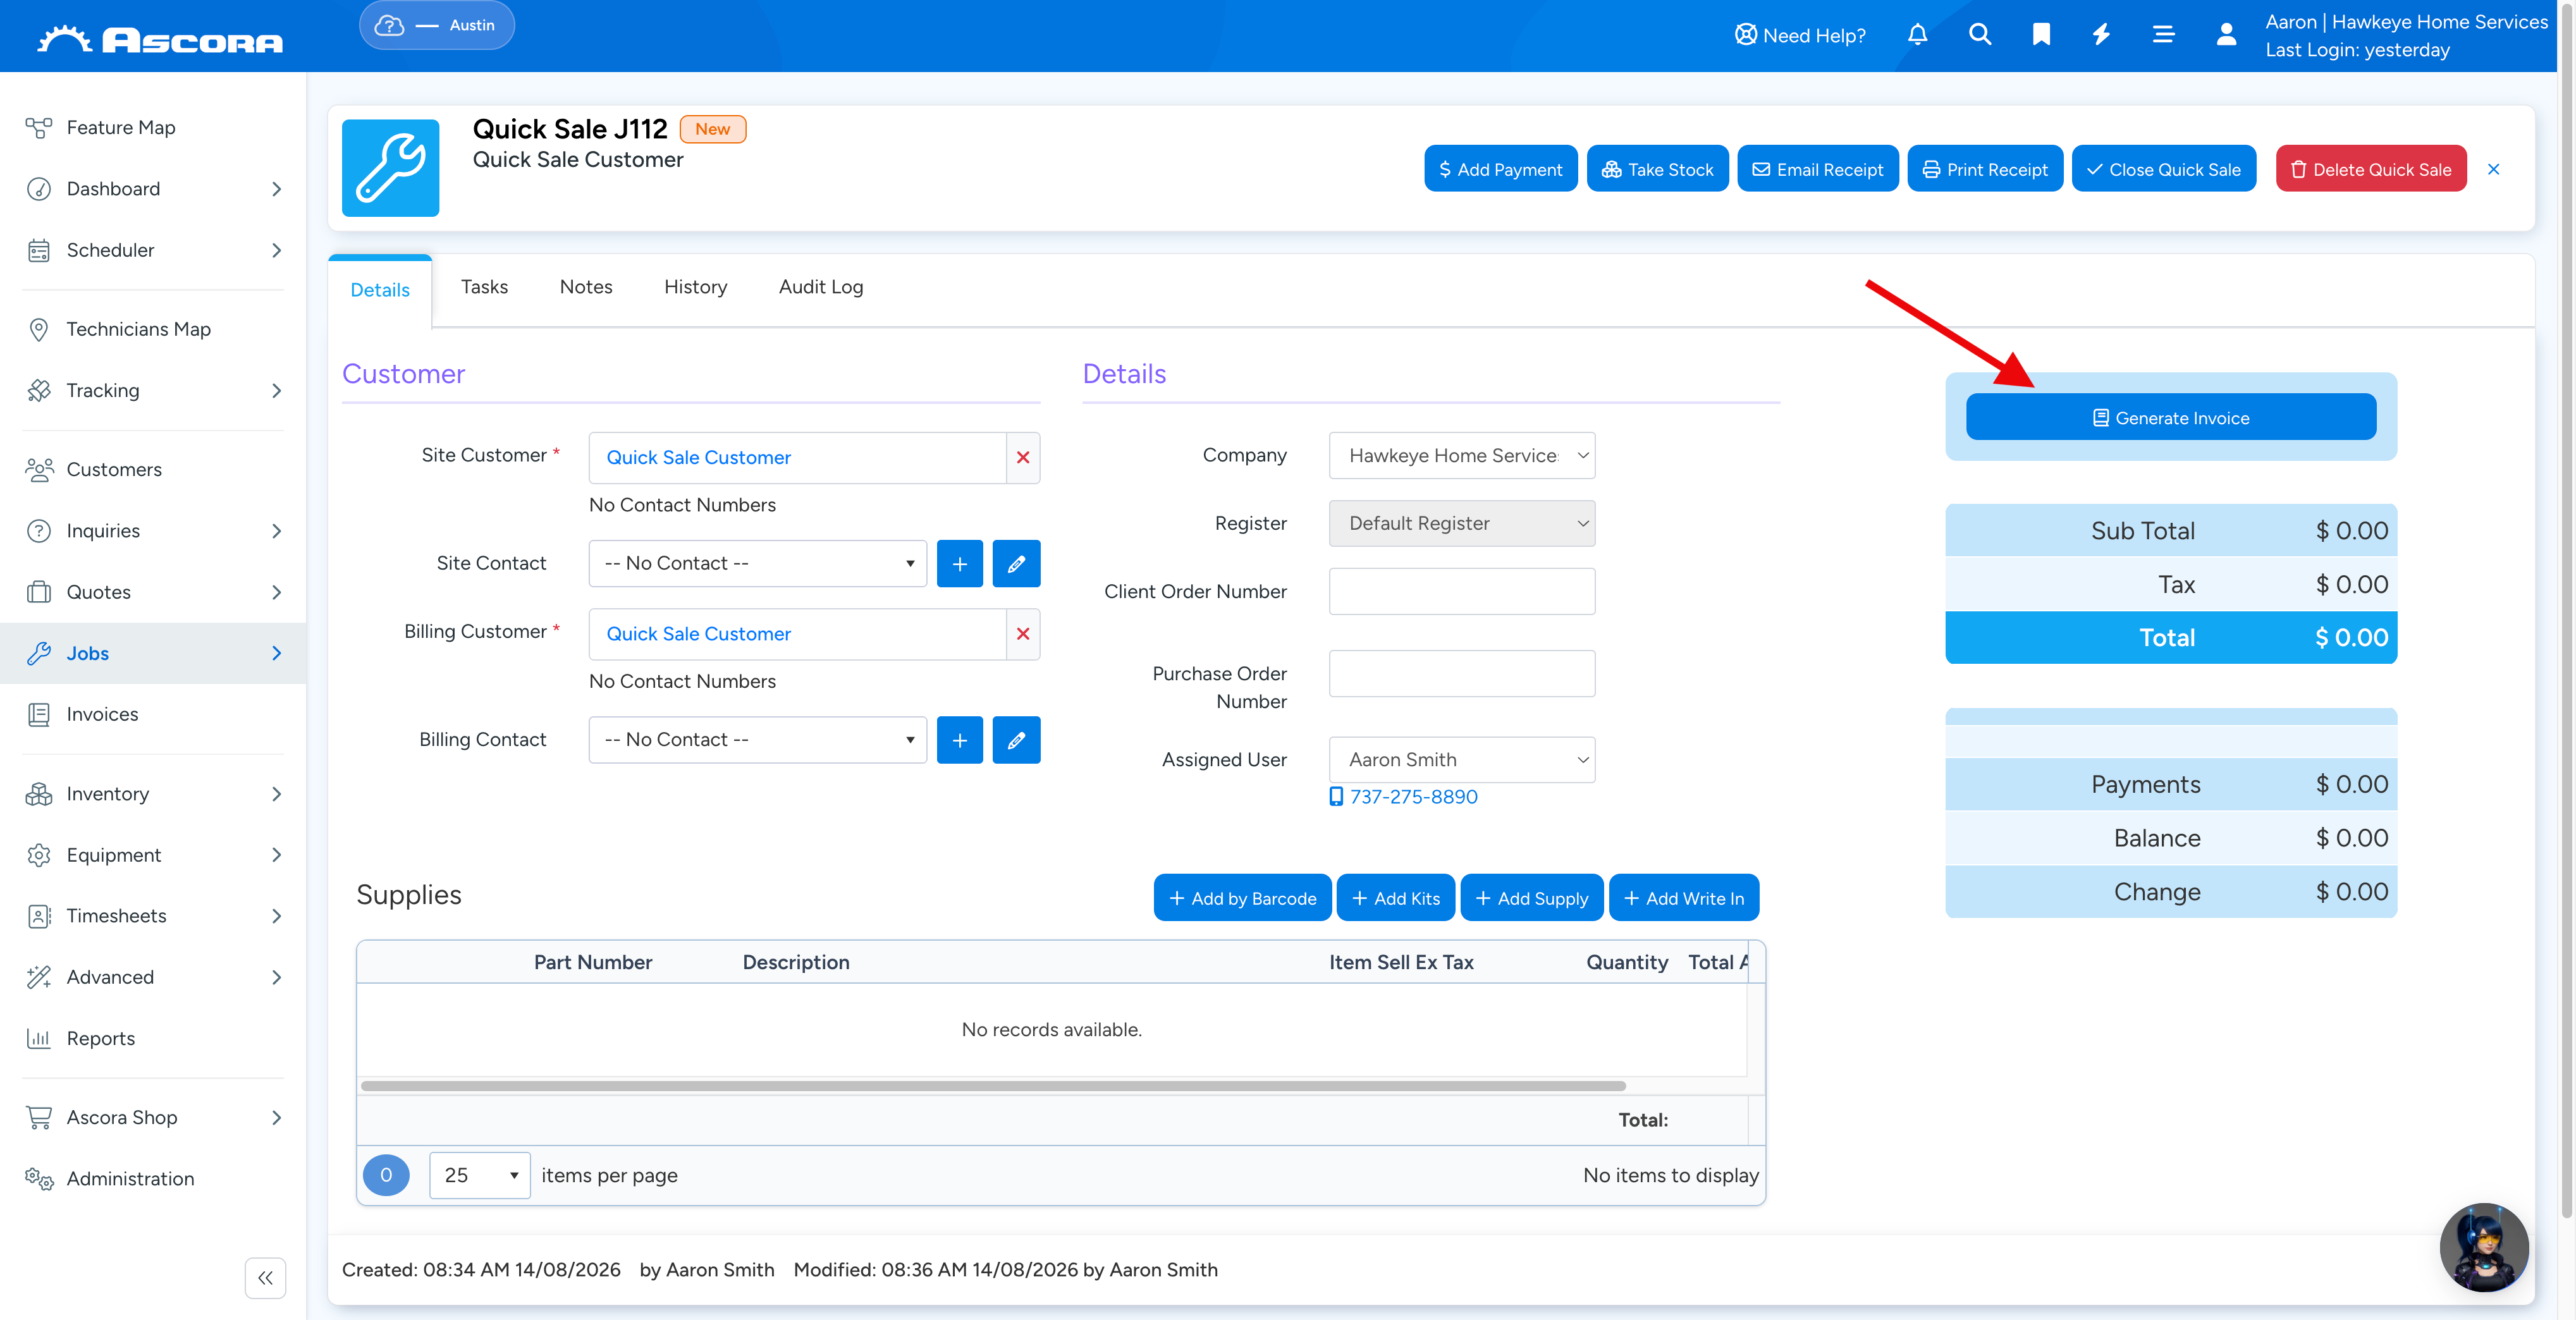
To generate an invoice, click Generate Invoice button which is located at the right side of the Quick Sale screen.
Once an invoice is generated, you can add a payment the same way we add payments to a standard invoice.
Note: To learn more about taking payments, please access 💳 How to take Credit Card Payments in Ascora user guide.
Sub Pages
Got a question?
Submit an Idea
💡 Go to Ideas Portal
Was this article helpful?
Contact support