











💻 How to update a Custom Form
Custom Forms in Ascora offer flexibility to ensure your business processes are streamlined and efficient. Whether you need to adjust formatting, add new fields, incorporate additional signatures, or enhance photo capture capabilities, this guide walks you through the process step by step.
This guide covers:
- Formatting changes (e.g., font size, layout, colors)
- Adding new content such as fields for signatures, checklists, and additional images
- Ensuring updates are reflected in the Ascora Mobile App
By following these steps, you can tailor your Custom Forms to align with your workflow, improving accuracy and ease of use for your team.
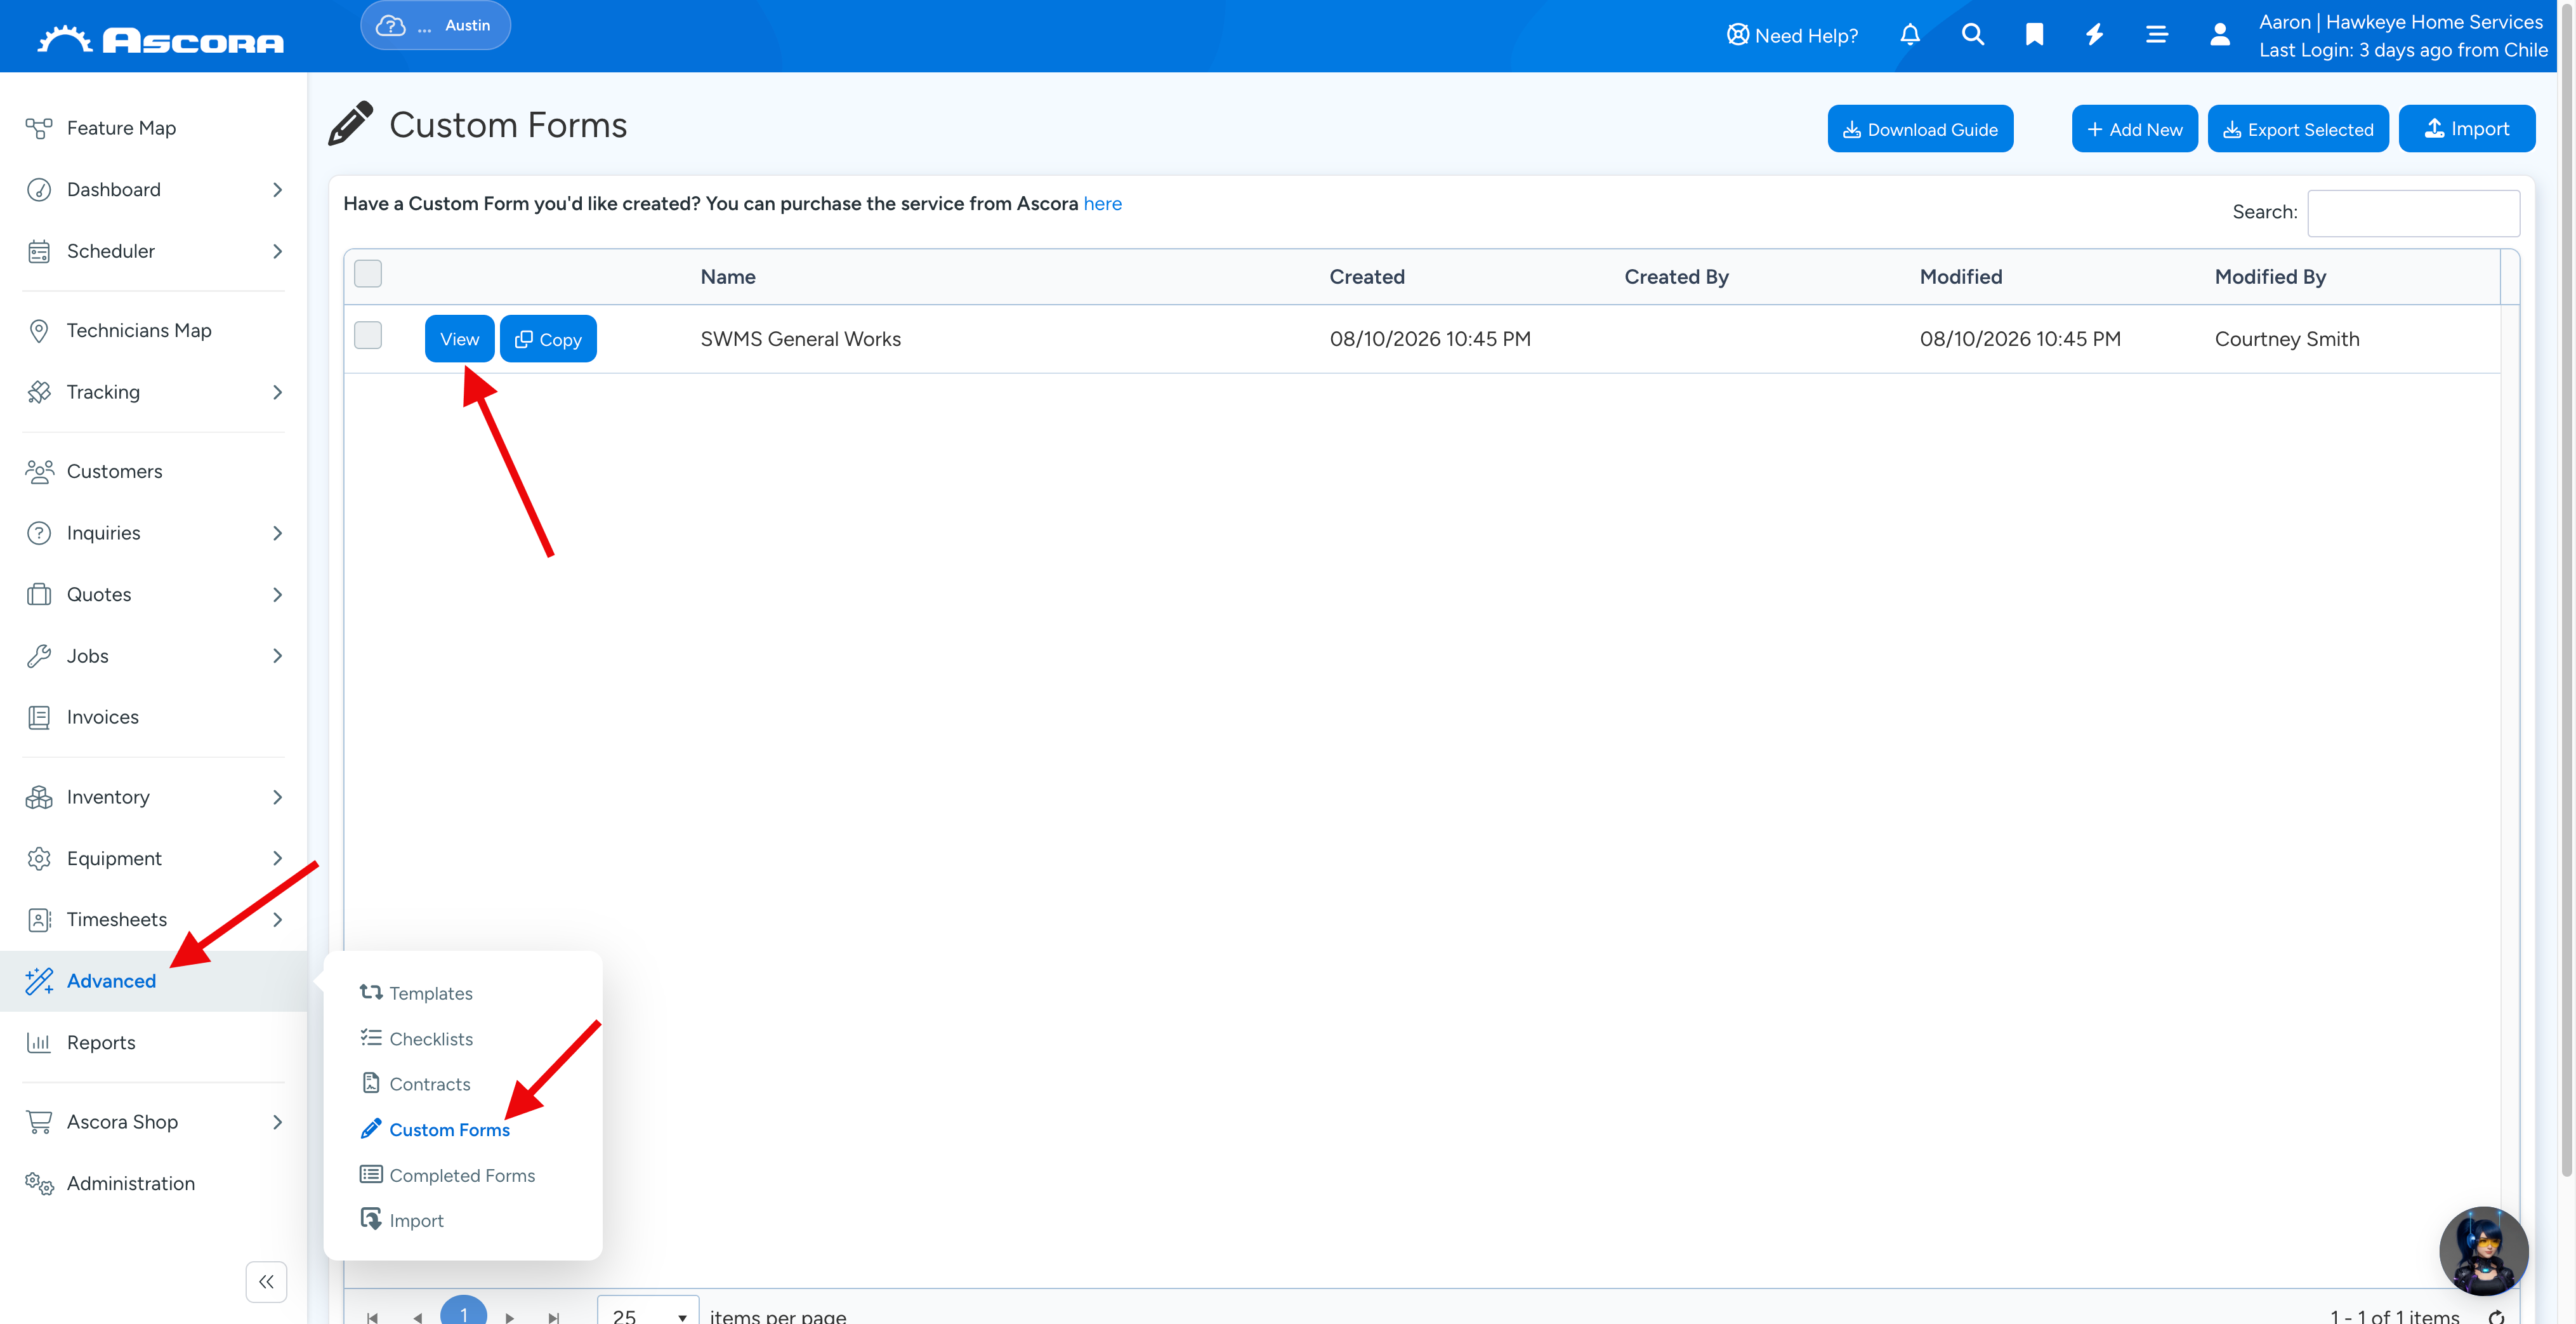
1. Go to Advanced → Custom Forms and click View for the form you want to edit.
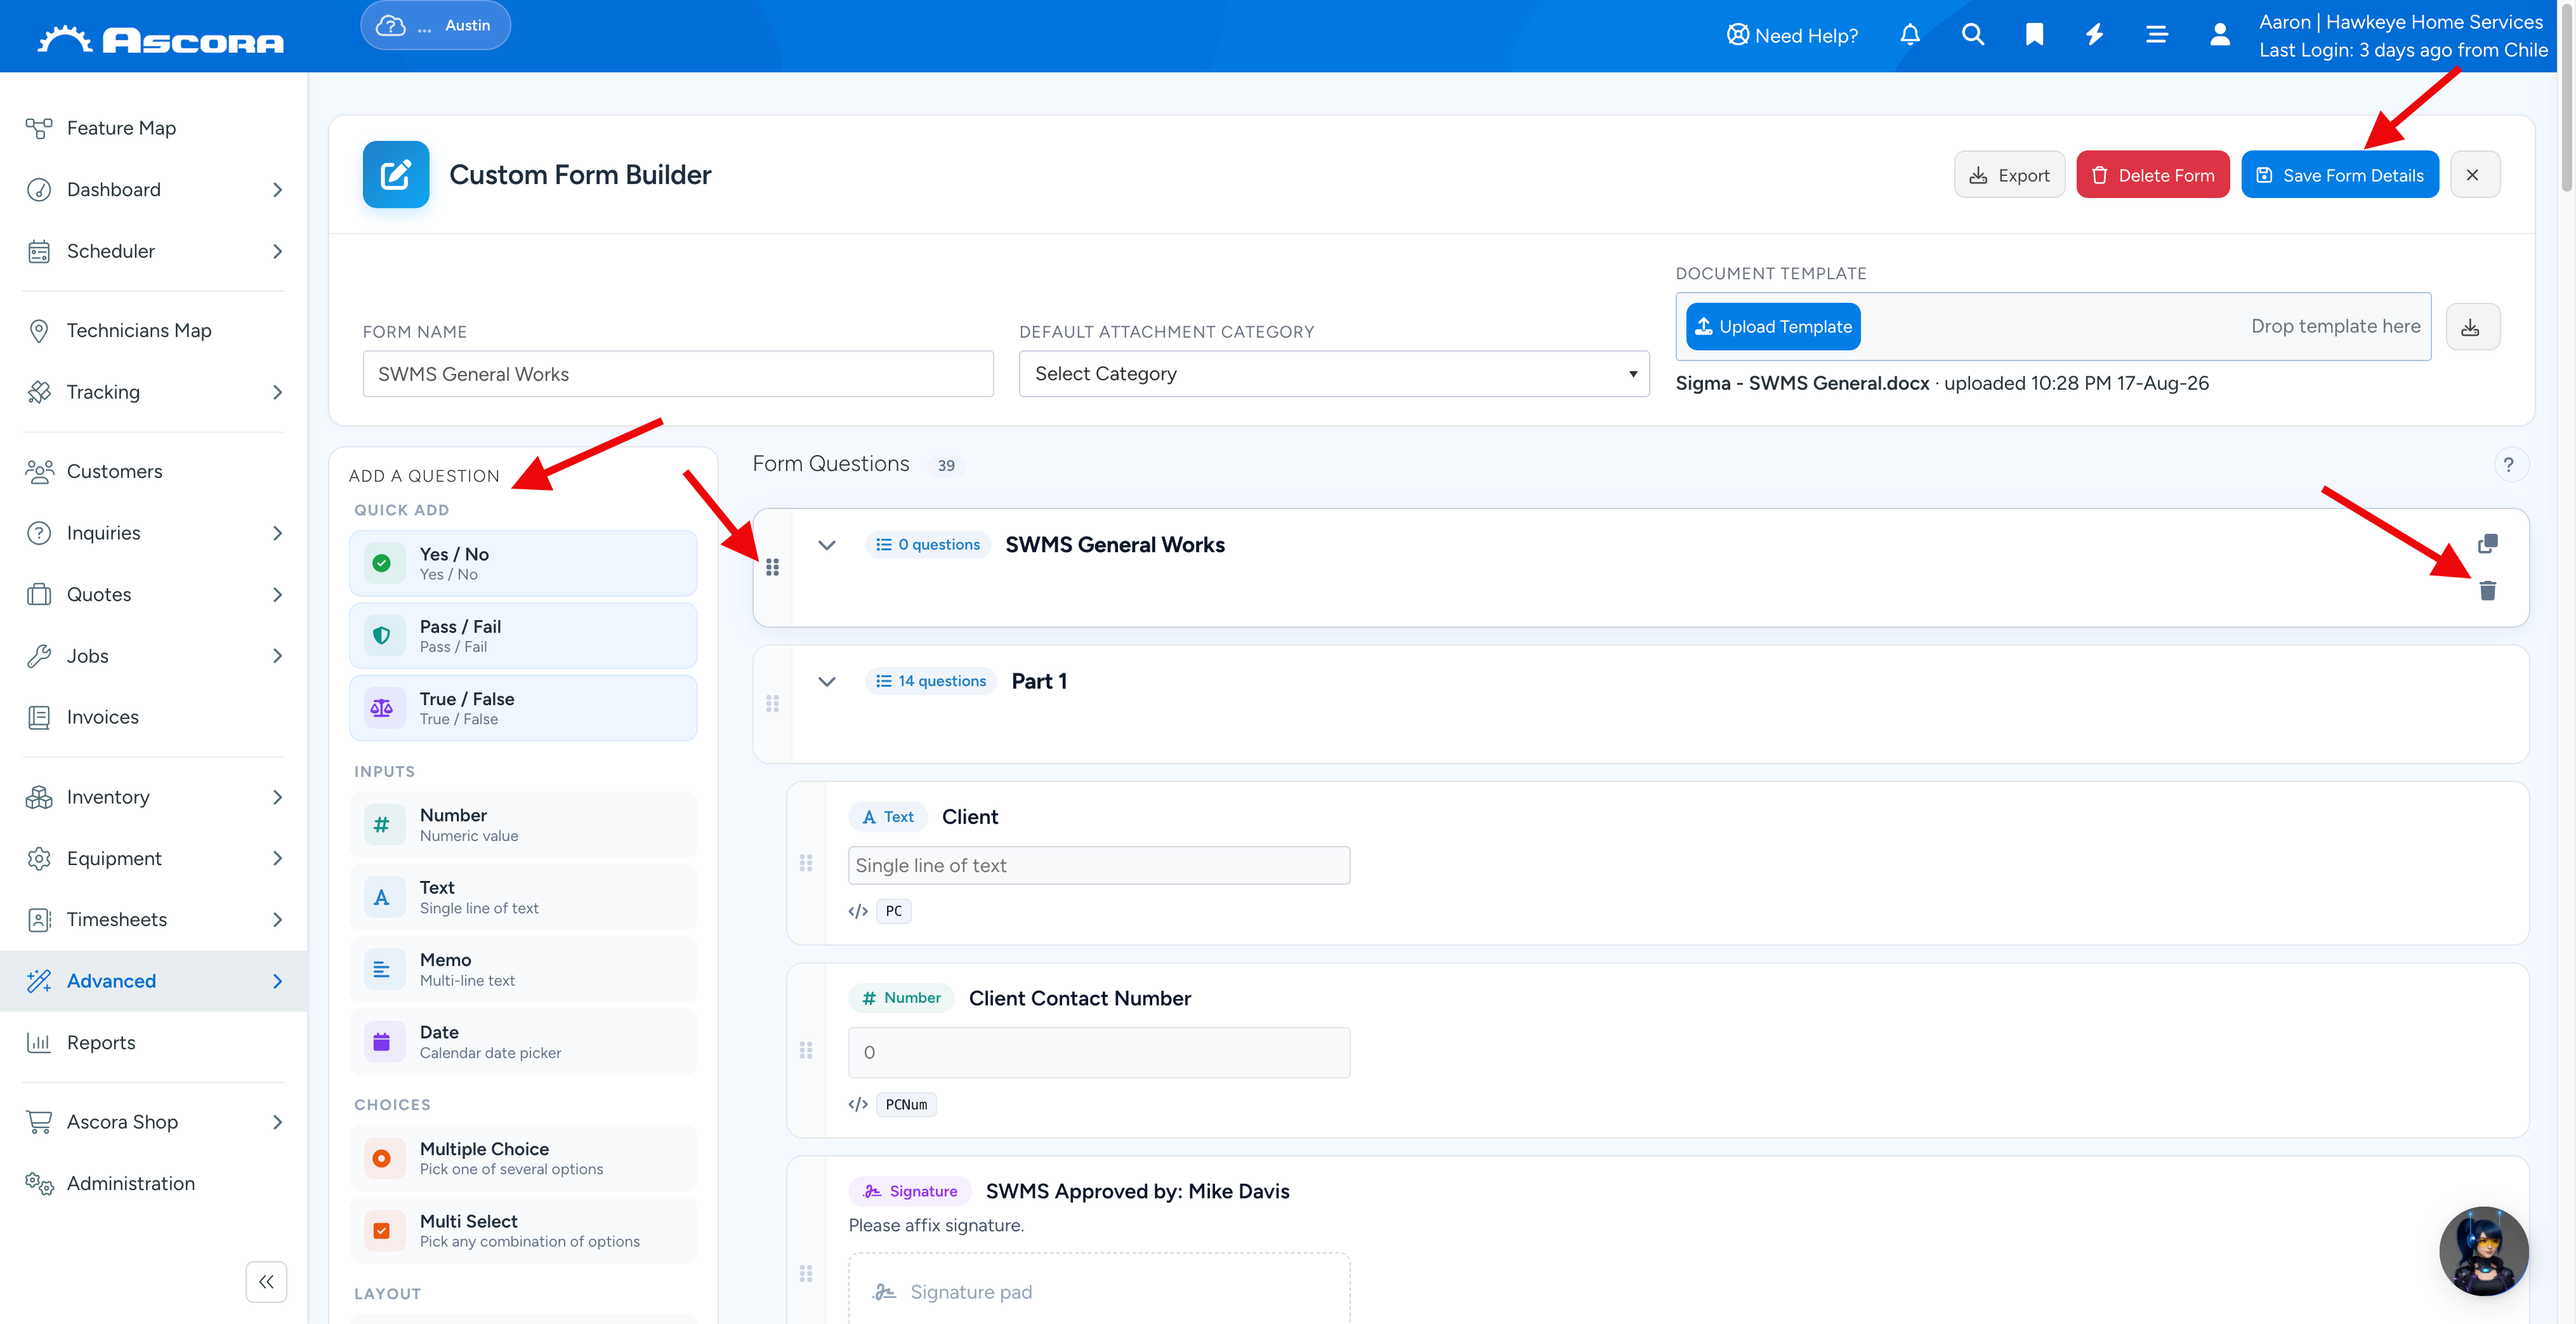
2. Here, you can add new questions, rearrange their order, delete existing fields, and edit any of them. Don't forget to save your changes.
Testing your Custom Form on your Mobile App
Make sure to do synchronisation first before running the testing.
1. Access your job from the mobile app.

2. Navigate to Custom Forms tab and tap the + button.
The form that appears should already be the updated version.

3. Click Generate and it should create a PDF version.
Remember not to use a draft or previously saved custom form to do the testing. Always tap the + button to test a new one.

4. After generating the form, you should immediately see the changes or updates.
In this example, we can confirm the changes that we've made on the JSA form such as increasing font size and changing some of the table headers highlights.

Note: If you make changes to the forms on the website, on the app after synchronisation, you will need to reselect the form as if you are filling in a new form. Do not use back the same form that you previously saved which will normally show on the screen as a line item as this will not be updated with the latest adjustments. In a real scenario, you do not want your previous forms completed and saved a few days or weeks ago to have the latest adjustments which was not applicable previously.
Content Changes
Access the Word Document file and make the necessary content changes.
In this example, we will make a content change by adding a signature field. Other content changes that you can make are adding fields to add photos, creating a checklist or task list, etc.
1. To add a signature, you need to insert a Signature placeholder which could be an image file by going to Insert → Photos → then select your signature or image place holder.
You may download the sample below and use it instead.

2. On your custom form, right click the image and select Format Picture.

3. Select Alt Text and under Title, enter a name which basically becomes your unique field code and click Close.
In this example, our field code is Signature and it must be exactly the same format when we enter this in Ascora Form Question later.

4. Go back to Ascora Custom Form page and Click New Question.

5. Enter the Field Name, Field Code, and select Signature as your Answer Type and click Save.

Testing your Custom Form on your Mobile App
Make sure to do synchronisation first before running the testing.
1. Access your job from the mobile app.
2. Navigate to Custom Forms tab and tap the + button.
The form that appears should already be the updated version.
3. Once the custom form is displayed, you would be able to add your signature.
Click Generate to proceed and it should create a PDF version.
Remember not to use a draft or previously saved custom form to do the testing. Always tap the + button to test a new one.

Note: If you make other changes such as adding a field to add a photo, you can just follow the steps above but this time, assign a unique field code. You can then go back to Ascora Custom Form area and add a New Question and select the answer type as Photo.
List of Answer Types that you can select when creating or adding a Custom Form question
NUMBER – restricts User input to numeric values only
TEXT – use for short, alpha-numeric answers. For example, a Task Name or a short answer
MEMO – use for questions which require longer answers
DATE – use for date entry fields
MULTIPLE CHOICE – use for Yes/No or multi-choice questions. When selected, an option list will display for you to enter the available options for te User to choose from (eg, Yes, No, etc)
MULTIPLE CHOICE, MULTIPLE ANSWER – works in a similar fashion to Multiple Choice however the User is able to select more than one of the available options
SIGNATURE – use to capture and insert a Signature
HEADING – choose this Answer Type for all company names, logos, document titles, headings, etc
PHOTO – used to capture and/or insert images. The user will have the option to take a photo using the mobile device, or attach a photo that already exists on the mobile device.
Got a question?
Submit an Idea
💡 Go to Ideas Portal
Was this article helpful?
Contact support